Experience Editor
The Experience editor is where you will build all of your Augmented Reality Experiences. This article is a brief overview to orient you to the space and its tools. For specific information about adding assets to your Experience, see the guides for assets and asset types.
For the best results, we recommend using a mouse whenever working in the Experience editor.
Camera Controls
Use your mouse to pan and rotate the camera in the Experience editor.
- Click and drag with the left mouse button to rotate the camera.
- Click and drag with the right mouse button to pan the camera.
- Use the mouse wheel to zoom in and out, or pinch to zoom on a trackpad. Please note that we recommend using a mouse whenever working in the Experience editor.
- Use the orientation tool by clicking on the X, Y, or Z axis in the bottom right corner to orient the camera to that position.
AR Editor
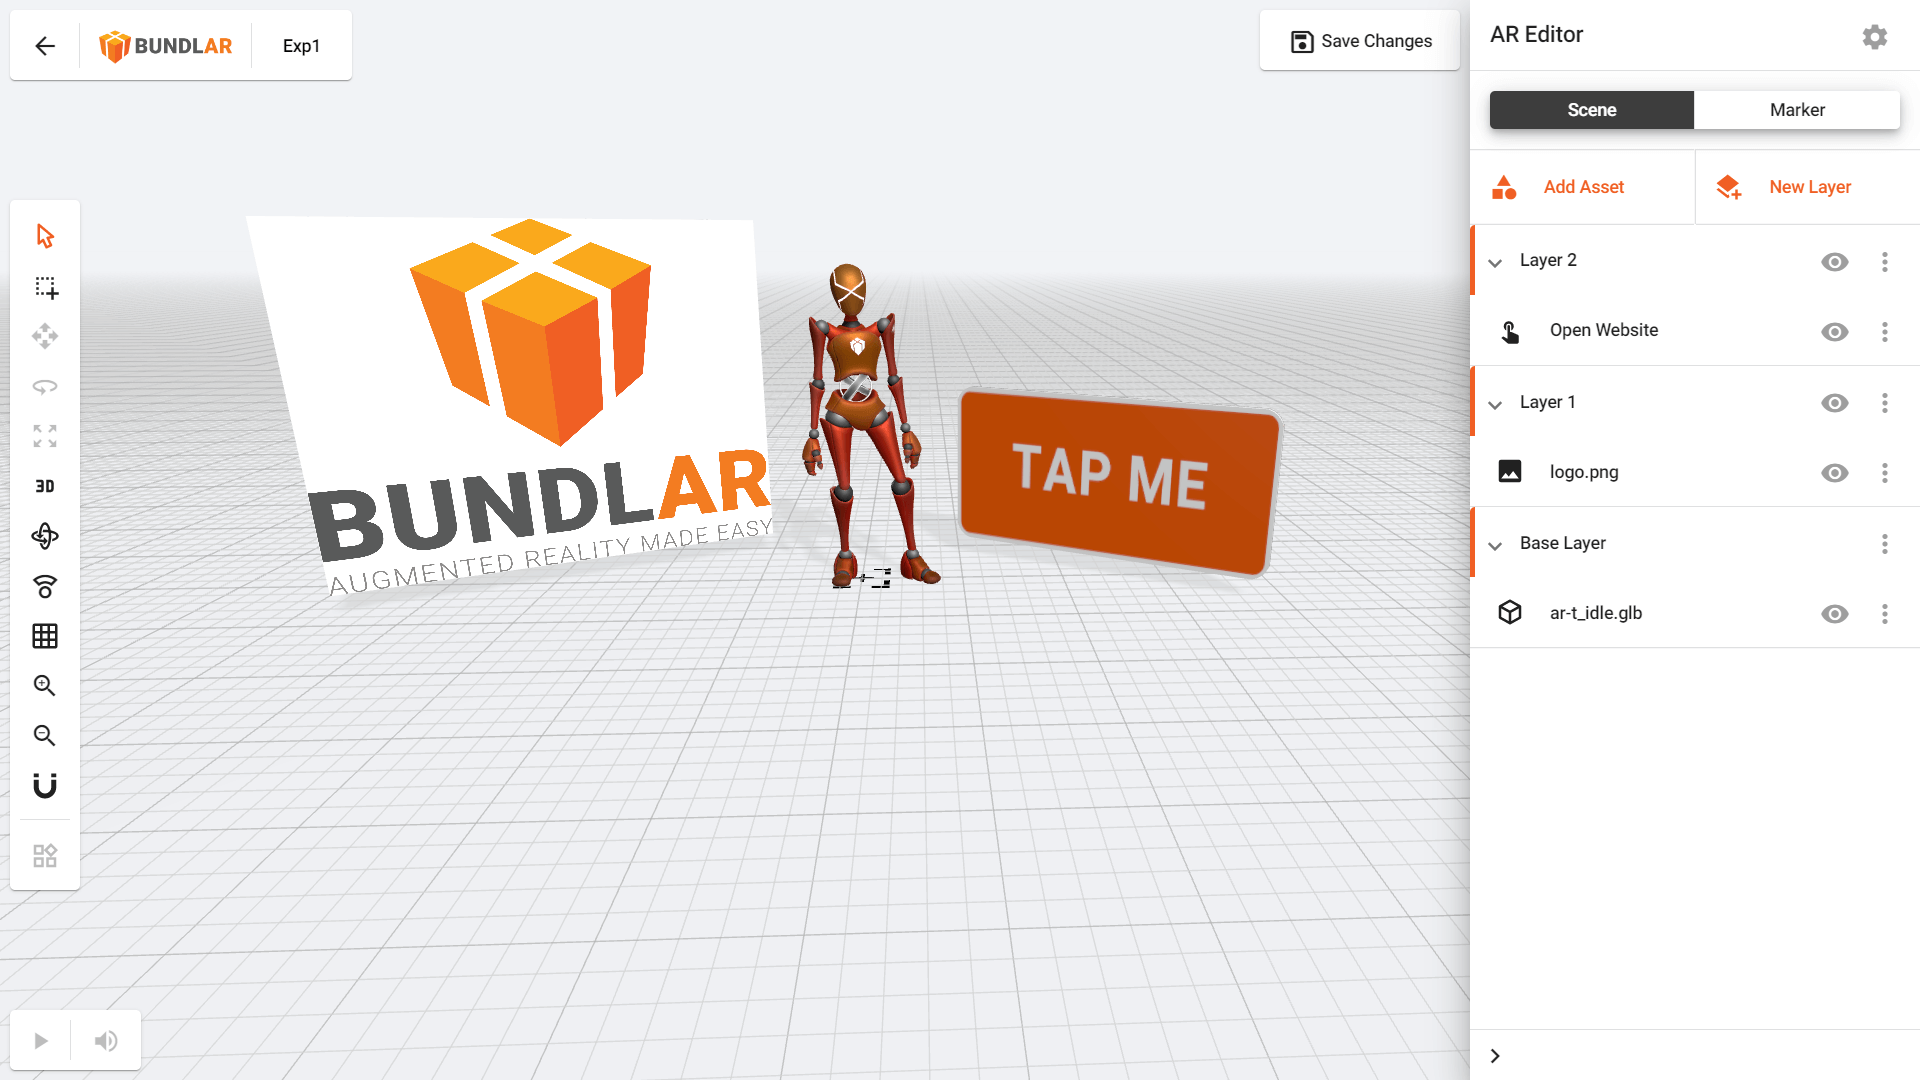
The AR editor is the primary tool you will use in the Experience editor to upload and edit assets. It also contains information about the Experience’s layers, marker, and some specific settings. To open the AR editor, simply click “Edit Experience” in the top right corner.
Scene
The scene is a digital representation of where your assets will appear in augmented reality. You can arrange and edit your assets in the scene to change how they will appear to the user.
Assets & Layers
All content in an Experience is made of different assets. Types of assets include 3D models, images, videos, labels, buttons, and more. Use the AR editor to upload new assets to your Experience, or view and edit existing assets. For more comprehensive information, see our page on assets.
Assets can also be organized into layers, which allow you to control their visibility in your Experience. For more comprehensive information, see our page on layers.
Marker
Under the Marker section of the AR editor, you can view an Experience’s image marker or upload a new one. In image marker Experiences, you can control the opacity of the marker in the editor. You can also change the trigger type from image marker to markerless or vice versa.
Settings
The Settings section contains a variety of options for both viewers and editors.
Editor Settings
- Trackpad Mode: Invert the left and right mouse buttons, so that left click will rotate and right click will pan.
- Measure in Feet: In markerless Experiences, change the scale of the grid so one large square is equivalent to one square foot when viewed on the app. By default, one large square is equivalent to half a square meter.
- Grid Snapping: Enable assets to snap to grid. Once enabled, you can customize the increment by which assets move.
- Infinite Grid and Grid Radius (Experimental): Choose between an infinite grid and a grid with a limited radius. Note that this is an experimental setting, and you must first enable experimental features to view it.
- Hotkey Settings: Customize your keyboard shortcuts for tools on the toolbar. Click the orange pencil icon to record a new hotkey. Assets with a gray pencil icon beside them cannot be edited.
- Render Info: View additional information about the size of assets in your Bundle, which can affect performance in the app.
- Experimental Features: Enable experimental features. Experimental features are advanced tools that should be used with caution. Before enabling experimental features, see our guide.
- Dark Theme: Enable dark mode.
App Settings
- Start State: In Experiences with only one asset, set the asset to start in fullscreen. Once the Experience has launched, users will not need to continue pointing their device at the trigger.
- Enable Position: Allow users to move assets while viewing the Experience.
- Enable Rotation: Allow users to rotate assets while viewing the Experience.
- Enable Scale: Allow users to scale assets while viewing the Experience.
Default Hotkeys
| Windows | Mac | |
|---|---|---|
| Multiselect | Alt+M | Ctrl+M |
| Save Experience | Ctrl+S | Cmd+S |
| Select all assets | Ctrl+A | Cmd+A |
| Delete asset | Delete | Delete |
| Position tool | Alt+T | Ctrl+T |
| Rotation tool | Alt+R | Ctrl+R |
| Scale tool | Alt+S | Ctrl+S |
| Switch transform controls | Spacebar | Spacebar |
| Toggle snap to grid | Alt+N | Ctrl+N |
| Toggle grid | Alt+G | Ctrl+G |
| Zoom in | Alt++ | Ctrl++ |
| Zoom out | Alt+- | Ctrl+- |
| Recenter camera | Alt+C | Ctrl+C |
| Toggle orientation tool | Alt+O | Ctrl+O |
| Switch camera mode | Alt+P | Ctrl+P |
| Focus on asset | F | F |
Toolbar
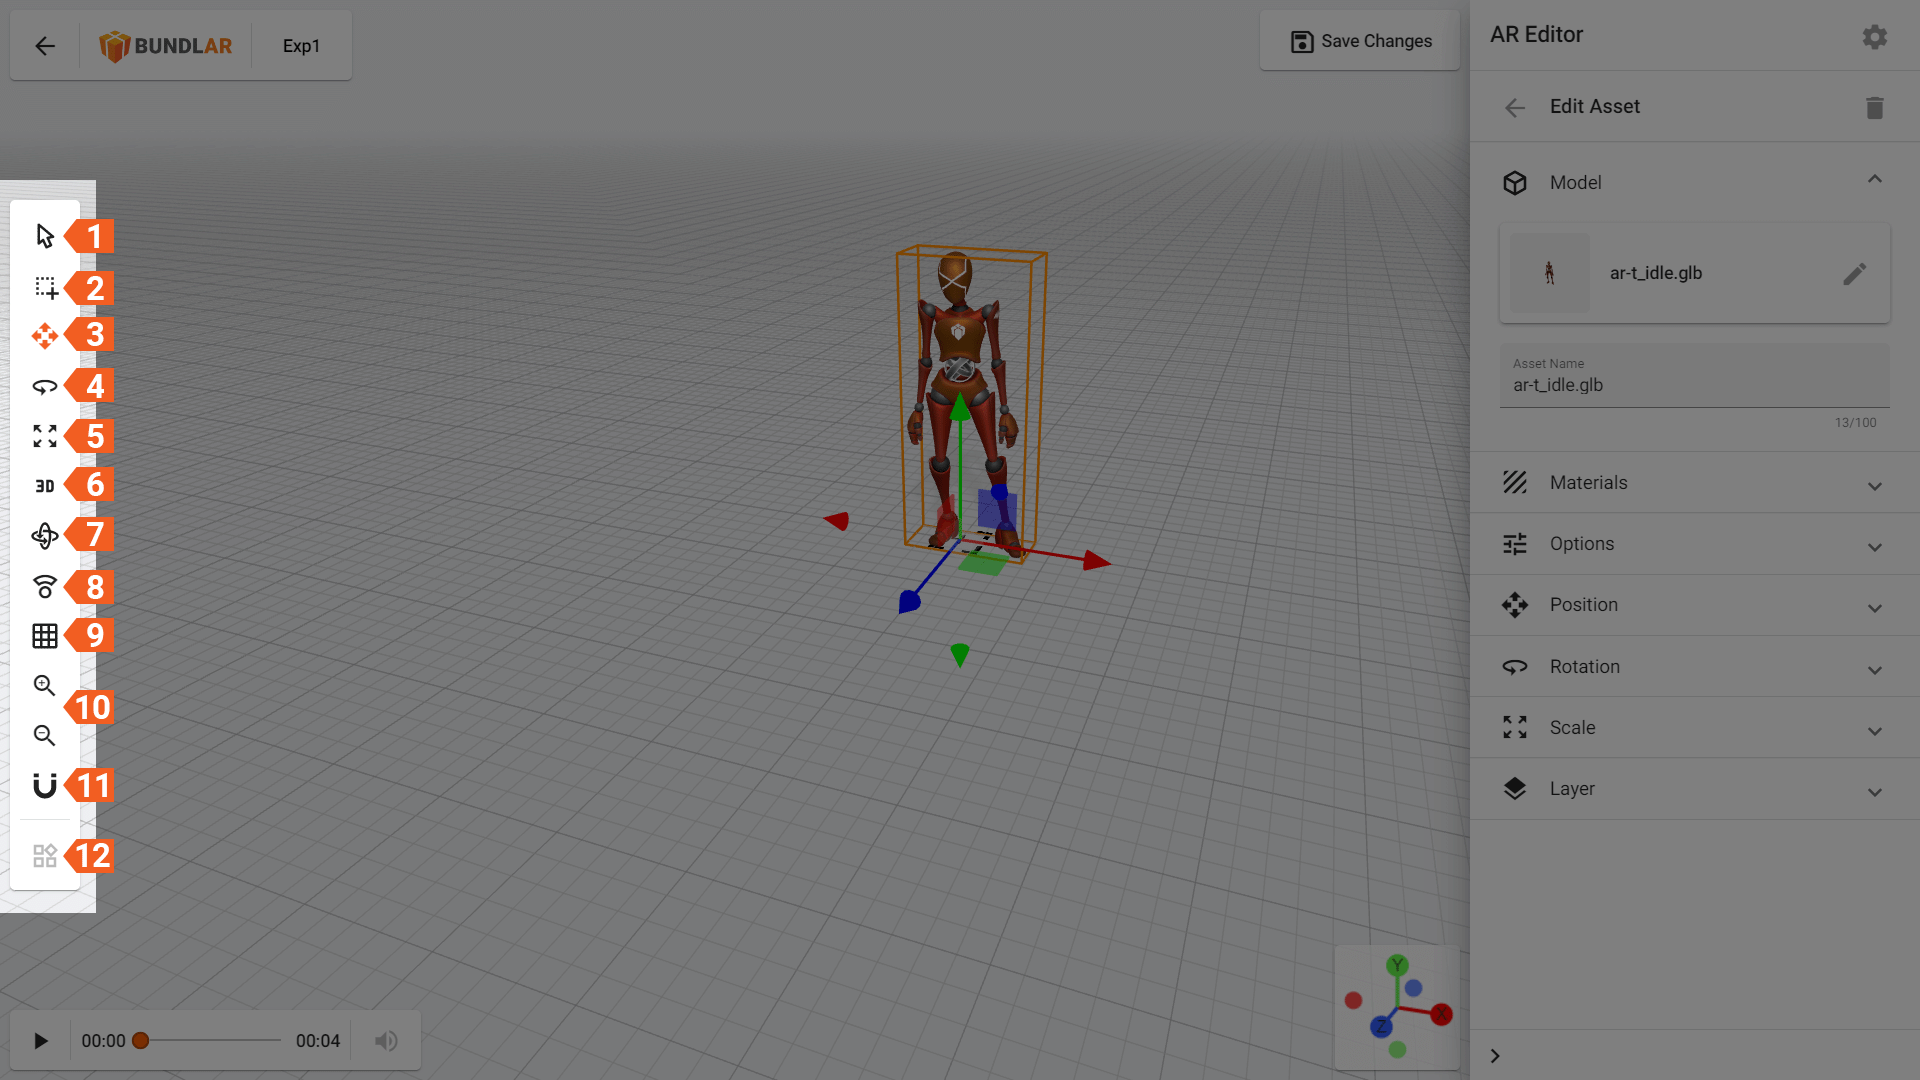
- Select: Select a single asset to edit it.
- Multiselect: Select multiple assets with a marquee tool.
- Position: Move your asset across 3D space.
- Rotation: Rotate your asset.
- Scale: Change the size of your asset.
- Orthographic camera: Switch to a two-dimensional representation of the three-dimensional space. The orthographic camera is useful for precisely aligning three dimensional objects along a given axis.
- Orientation tool: Show or hide the orientation tool in the bottom right corner. Click on the X, Y, or Z axis in the tool to orient the camera to that axis.
- Re-center camera: Focus the camera back to the center of the Experience.
- Toggle grid: Show or hide the grid.
- Zoom: Zoom in and out of the Experience.
- Snap to grid: Enable grid snapping when changing an asset’s position, rotation, or scale
- More tools: Drag and drop tools from the toolbar here to customize its layout.
Video & Animation Controls
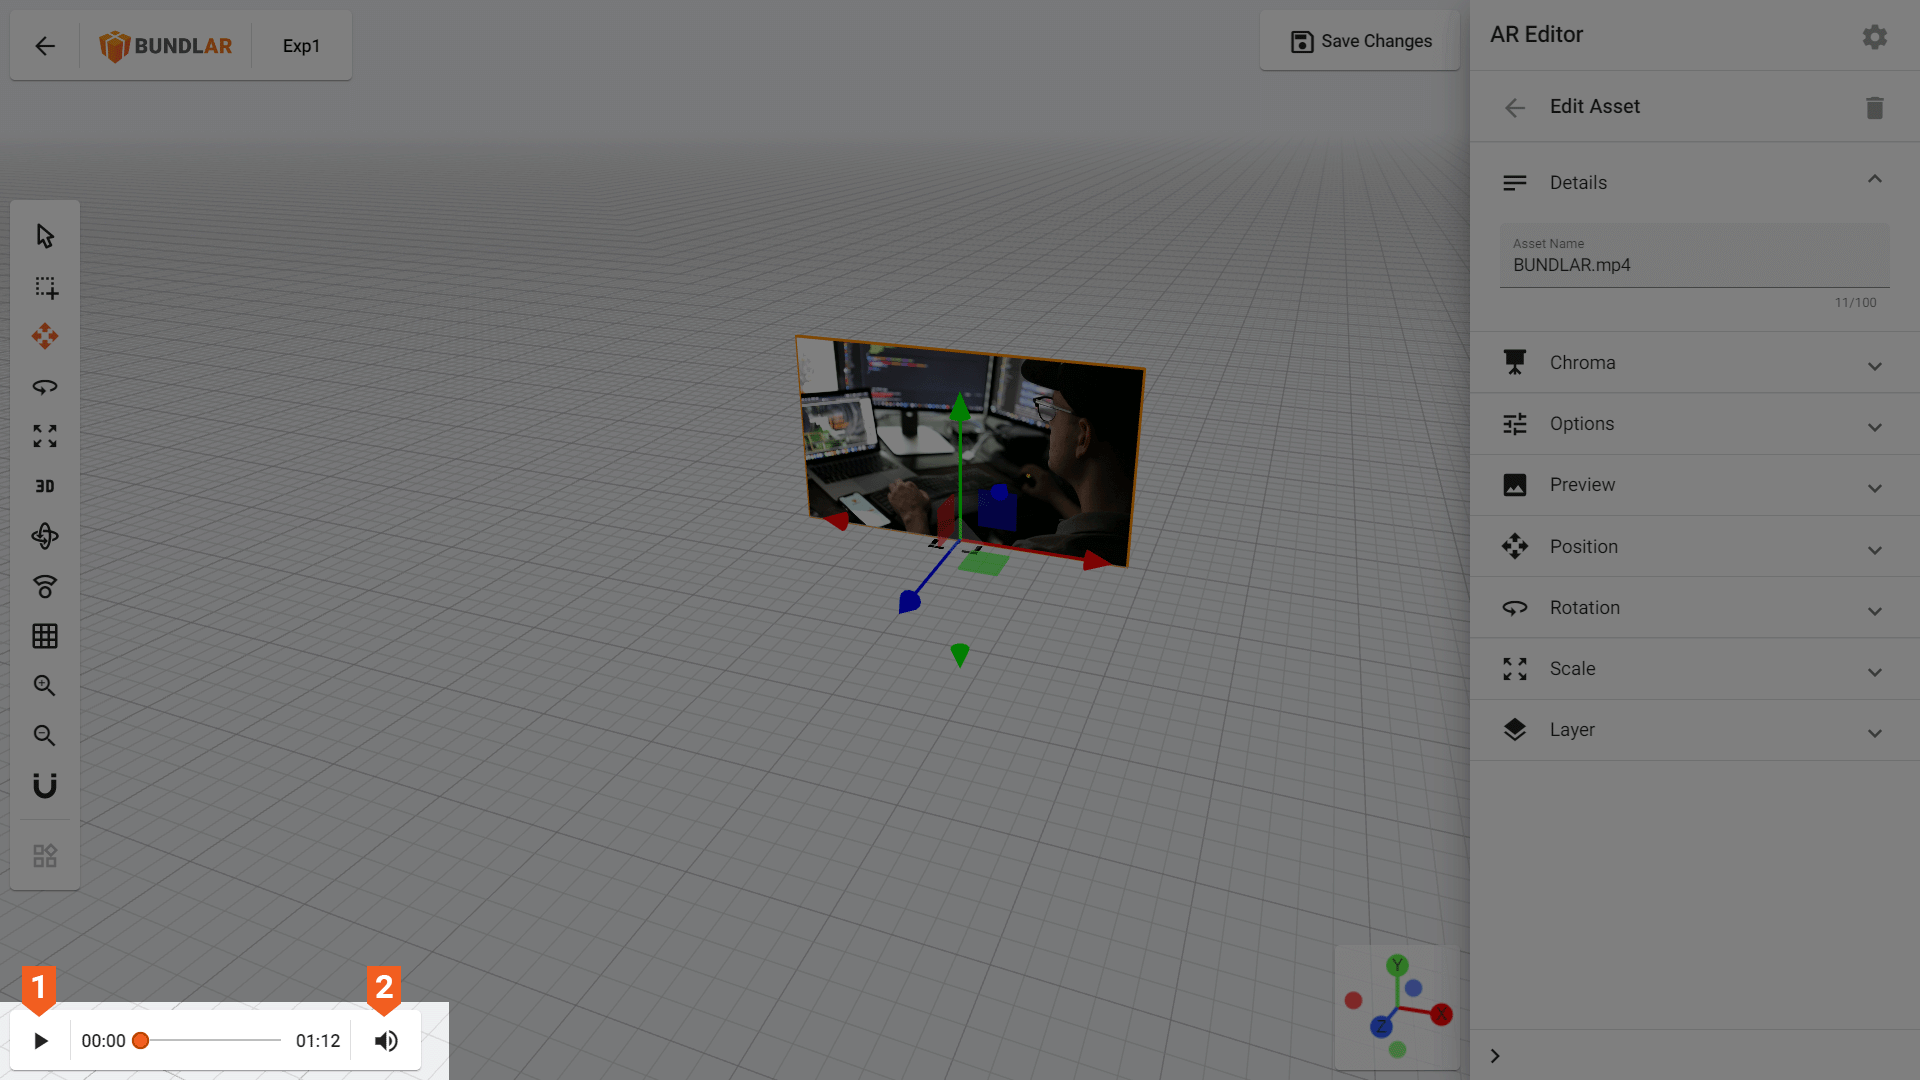
Preview a video, audio clip, or animated 3D model in the CMS.
- Pause/play: Stop or start a video, audio clip, or animated 3D model. This does not affect how the asset will be viewed in the app.
- Volume: Adjust the volume of a video or audio clip. This does not affect how the asset will be viewed in the app.