
BUNDLAR UNIVERSITY

Experiences

An Experience is a single instance of Augmented Reality. Each Experience is made up of a collection of assets such as 3D models, videos, or labels. If a Bundle is like a website, the Experiences are the individual pages, and the assets are the content on the page.

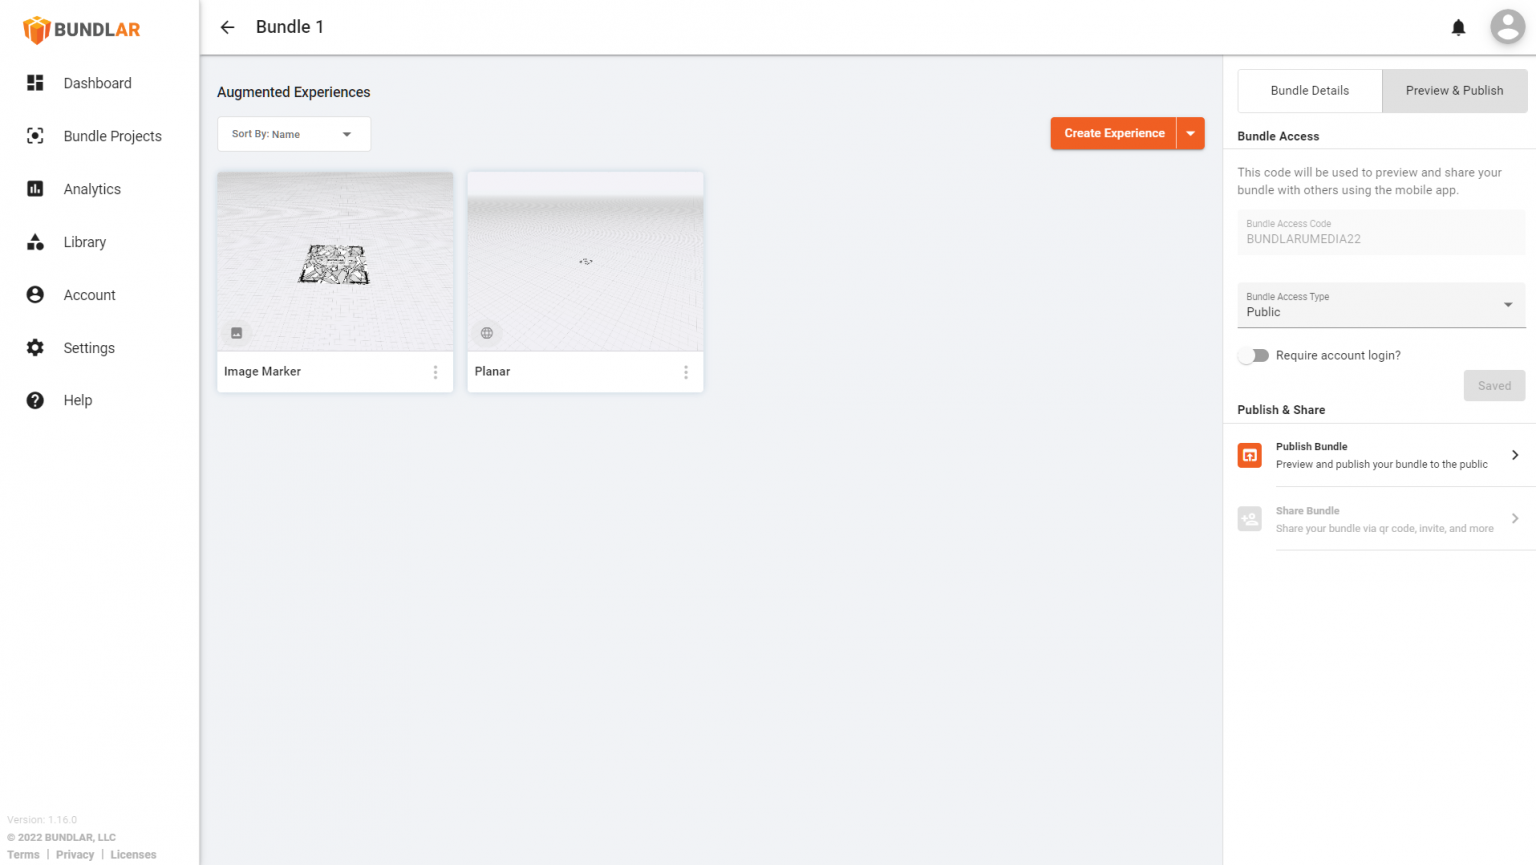
Each Experience has its own trigger, something in the physical world that prompts it to begin. BUNDLAR currently support two kinds of triggers: image marker and markerless (formerly planar).

Image marker Experiences begin when a user downloads a Bundle and points their device at a specific, visually distinct 2D image. Markerless Experiences can be placed on any flat surface, such as a wall, table, or floor.

Bundle-Page-2-1536x865

Add an Experience with an Image Marker

Create an Augmented Experience which will trigger when the user looks at a distinct image marker. Once you create your Experience, you can view the image marker in the CMS for easy access.

  1. Open the Bundle Project you would like to edit in the BUNDLAR CMS.
  2. Click the orange “Create Experience” button.
  3. Select “Image Marker” from the dropdown.
  4. Enter a name for your new Experience. Then click “Continue.”
  5. Click “Browse Library” to select a previously uploaded image marker, or drag & drop a file from your computer.
    • Alternatively, you can create a random unique image marker by clicking “Generate Image.” These markers can be customized with text and color.
  6. Click “Continue” and begin composing your new Experience.

When you upload an image marker to an Experience, the CMS will automatically assess its strength on a scale of one to five stars.

View Image Marker

  1. Find the Experience you would like to view the image marker for in the BUNDLAR CMS.
  2. Click the three dots next to the Experience’s name.
  3. Select “View Marker.”

Change Image Marker

  1. Open the Experience you would like to edit in the BUNDLAR CMS.
  2. Click “Edit Experience” in the top right corner.
  3. Select “Trigger.”
  4. Click “Change Image” and upload a new image marker.Image markers must be in JPEG format.

See our Asset Guidelines for further guidance on image format and size.

Add a Markerless Experience

Create an Augmented Experience which the user can trigger on any flat surface.

  1. Open the Bundle Project you would like to edit in the BUNDLAR CMS.
  2. Click the orange “Create Experience” button.
  3. Select “Markerless” from the dropdown.
  4. Enter a name for your new Experience. Then click “Continue.”
  5. Begin composing your new Experience.

Change Marker Type

Switch a markerless Experience to image marker, or vice versa.

  1. Open the Experience you would like to edit in the BUNDLAR CMS.
  2. Click “Edit Experience” in the top right corner.
  3. Click the Marker tab. Under the Marker Type dropdown, select either image marker or markerless.
    • If switching to image marker, you will need to upload an image from your media library or generate a new one.
    • If switching to markerless, read the popup and click “Continue.”

Rename an Experience

Change the name of an existing Experience.

  1. Open the Experience you would like to rename in the BUNDLAR CMS.
  2. Click the name of the Experience in the top left corner.
  3. Enter a new name for your Experience. Then click “Continue.”

Duplicate an Experience

Create a copy of an Experience.

  1. Find the Experience you would like to duplicate in the BUNDLAR CMS.
  2. Click the three dots next to the Experience’s name.
  3. Select “Duplicate.”

Remove an Experience

Delete an existing Experience.

  1. Find the Experience you would like to remove in the BUNDLAR CMS.
  2. Click the three dots next to the Experience’s name.
  3. Select “Remove.”
  4. In the pop-up, read and check the box. Then click “Remove.”