Assets
All content in an Experience is made of different assets. Types of assets include 3D models, images, videos, labels, buttons, and more. For more information on specific kinds of assets, see our guides.
Add an Asset
Add assets like 3D models, videos, labels, and more to your Augmented Experience.
- Open the Experience you would like to edit in the BUNDLAR CMS.
- Click “Edit Experience” in the top right corner.
- Click “Add Asset,” then select the type of asset you want to add from the dropdown.
- Click “Browse Library” to select a previously uploaded asset, or drag & drop a file from your computer.
Assets that are very large or very small will automatically scale to a more reasonable size. To undo this, click the “Revert” button at the bottom of the screen.
Edit an Asset’s Position
Change the position, rotation, or scale of an asset after it is created.
- Open the Experience you would like to edit in the BUNDLAR CMS.
- Click “Edit Experience” in the top right corner.
- Select the asset you would like to edit.
- Choose one of the options below.
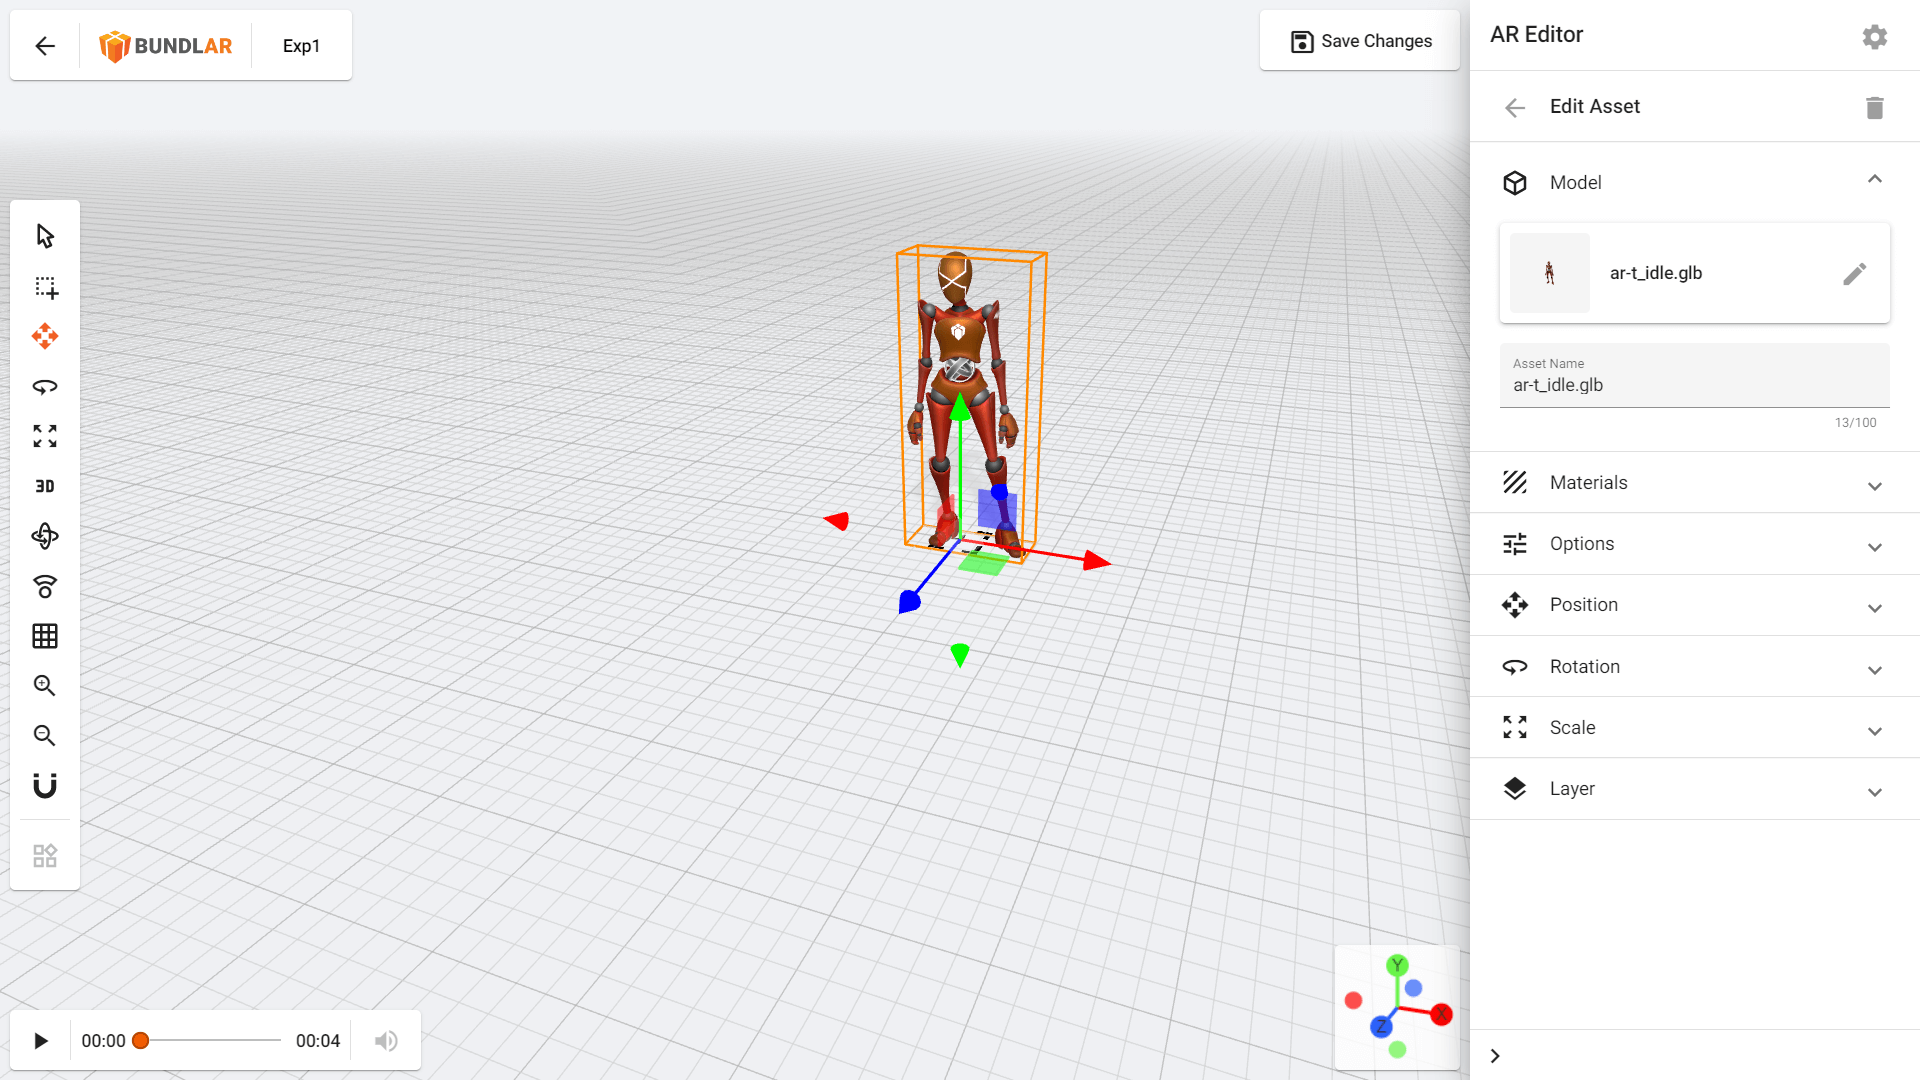
Position
Move your asset across 3D space. Select an asset, then click and drag the blue, red, and green arrows (collectively called a gizmo) to move the asset along a single dimension. The blue arrow corresponds to the Z axis, the red arrow corresponds to the X axis, and the green arrow corresponds to the Y axis.
Between the arrows of the gizmo are three colored squares. These squares allow you move the asset freely in two dimensions. The green square allows you to move the asset along the Z and X axes, the green square allows you to move the asset along the Z and Y axes, and the blue square allows you to move the asset along the X and Y axes.
Finally, the white diamond in the middle of the gizmo allows you to move the asset freely in all three dimensions.
To adjust your asset’s position more precisely, click on your asset and expand the “Position” option in the editor panel. Then, type an exact value in each box to move the asset that number of grid squares.
To quickly switch to the position tool, click “Position Asset” on the toolbar on the left side of the screen. Then, use the gizmo or type an exact value.
Rotation
Rotate your asset. Select an asset, then click and drag the blue, red, and green circles (collectively called a gizmo) to rotate the asset around a single axis. The blue circle rotates around the Z axis, the red circle rotates around the X axis, and the green circle rotates around the Y axis. Finally, the large white circle around the outside of the gizmo allows you to rotate the asset freely in all three dimensions.
To adjust your asset’s rotation more precisely, click on your asset and expand the “Rotation” option in the editor panel. Then, type an exact value in each box to rotate the asset that number of degrees.
To quickly switch to the rotation tool, click “Rotate Asset” on the toolbar on the left side of the screen. Then, use the gizmo or type an exact value.
Scale
Change the size of your asset. While you can use the colored boxes in the gizmo to scale the asset in a single dimension at a time, you will typically want to scale your asset proportionally. Click and drag the white box in the center of the gizmo to scale the asset in all dimensions at the same time.
To adjust your asset’s scale more precisely, click on your asset and expand the “Scale” option in the editor panel. Then, type an exact value to scale the asset by that percentage.
To quickly switch to the scale tool, click “Scale Asset” on the toolbar on the left side of the screen. Then, use the gizmo or type an exact value.
While most assets have the option to change position, rotation, and scale, some (such as media players) do not.
Asset Scale & the BUNDLAR App
It is important to appropriately scale your assets so they are not too large or too small when viewed on the app. In image marker Experiences, all assets will be proportional to the size of the physical image marker which the user points their device at. In markerless Experiences (formerly planar), assets will be sized according to the grid in the CMS. One large grid square is approximately equivalent to half a meter.
Therefore, the scale of markerless Experiences when viewed will be more or less consistent, while the scale of image marker Experiences can vary widely depending on the size of the image marker provided to the user.
Duplicate an Asset
Create a copy of an asset in an Augmented Experience.
- Open the Experience you would like to edit in the BUNDLAR CMS.
- Right-click on the Asset.
- Select “Duplicate.”
A duplicated asset will appear directly on top of the original. Move the asset to see both copies.
Delete an Asset
Remove an asset from an Augmented Experience.
Method 1
- Open the Experience you would like to edit in the BUNDLAR CMS.
- Right-click on the asset.
- Select “Remove.”
- In the pop-up, read and check the box. Then click “Remove.”
Method 2
- Open the Experience you would like to edit in the BUNDLAR CMS.
- Click “Edit Experience” in the top right corner.
- Select the asset you would like to remove.
- Click the trash icon in the top right corner.
- In the pop-up, read and check the box. Then click “Remove.”
Change an Asset’s Start State
Set an Augmented Experience to launch in fullscreen when triggered. Users will not need to point their camera at the image marker once the Experience begins.
- Open the Experience you would like to edit in the BUNDLAR CMS.
- Click “Edit Experience” in the top right corner.
- Click the gear icon.
- Under Start State, select “Fullscreen” from the dropdown.
This option is only possible for Experiences with a single asset in them.